
I say this guide would be for a masochist, because a normal person would just buy a ghost subscription, and therefore spend less money and less time. But not me!
My excuse is that I want to have total control.
Luckily for you other masochists: I have all my steps documented, so you'll spend one hour less to configure the server.
I discovered Ghost while following Mensur Duraković’s blog mensurdurakovic.com. First what I liked was the clean UI, then I looked at where can I get that theme. Googling a bit more and I find out about Ghost - CMS that runs on NodeJS. Having it just run on Node makes it more performant than php, right from the start. There's no concept of plugins in Ghost, but I really don't need anything more than I already have on Ghost.
One of the things I love about Ghost is the native support for writing posts in markdown. I’m more comfortable with writing in markdown, since I use it regularly for developer documentation.
Requirements for Self hosted Ghost
- Server instance - take a look at Hetzner
- Domain - get a cheap domain from namecheap
- Command line and server management knowledge
Time to configure: around 1 hour
Choosing the right hosting for Ghost
My choice of server is CentOS on Hetzner. It's cheaper to get more RAM and CPU on Hetzner vs AWS ec2/lightsail. I used a dedicated vCPU with 8gb RAM + 2 vCPU. With backup, it's around 18 EUR.
If you decide to go with AWS, Lightsail has an installation for Ghost, and there's also one for EC2 on AWS marketplace. In both cases, you'll get Ghost behind Apache as a proxy server. Minimum server requirements for Ghost are listed in the official documentation. I tried with 1GB RAM first, wasn't enough for my blog. Keep in mind that ghost needs to run along with proxy server and there are some other system related services that need to run smoothly. I'd say don't go below 2GB RAM.
Setup Ghost
Install Node and Ghost
My setup includes Ghost running on NodeJS with MySQL persistance behind Nginx.
- Install Node. Always take a look at the recommended node version before installing. At the time of configuring, recommended was 18. Now I see 20 is supported.
dnf module install nodejs:18- Configure global npm package without sudo to avoid permission errors when installing global node modules without sudo.
- Install Ghost.
npm install ghost-cli@latest -g
mkdir ghost
cd ghost
ghost install local
Add systemd service
You'd want your ghost blog to start on service boot and restart it automatically if it crashes or stops unexpectedly. That's what systemd is for.
Create a /etc/systemd/system/ghost.service file and add something like:
[Unit]
Description=Ghost systemd service
Documentation=https://ghost.org/docs/
After=network.target

[Service]
Type=simple
WorkingDirectory=/var/www/ghost
ExecStart=/usr/bin/node /var/www/ghost/current/index.js
Restart=always
User=ghost
Group=ghost
Environment="NODE_ENV=production"

[Install]
WantedBy=multi-user.target
Enable the service and start it:
sudo su
systemctl enable ghost
systemctl start ghost
Check if it started with systemctl status ghost and stop it with systemctl stop ghost.
Configure MySQL
- Install RDBMS - By default, ghost will persist data to SQLite. I'd suggest switching to MySQL, since MySQL 8 will be the required database in the next major release of Ghost. This tutorial is ok to follow for installing MySQL8 on Centos 9.
- Create database, user and assign permissions:
mysql -u root -p # enter pass

CREATE DATABASE ghost_db;
CREATE USER 'ghost_user'@'localhost' IDENTIFIED BY 'your_password';
GRANT ALL PRIVILEGES ON ghost_db.* TO 'ghost_user'@'localhost';
FLUSH PRIVILEGES;
EXIT;- Configure ghost (part1) - configure your ghost instance, there'll be config.development.json there by default. If you create a config.production.json, ghost will pick that up on next restart.
"url":"https://yourblogdomain.com",
"database": {
  "client": "mysql",
  "connection": {
    "host": "localhost",
    "user": "ghost_user",
    "password": "your_password",
    "database": "ghost_db"
  }
}
partial config.production.json
- Db access will only be available on the server and you can access it with
mysql -u root -p.
SSH Tunneling MySQL
If you've disabled remote access to your SQL, don't worry, you can still access it remotely. Access it from your machine via SSH tunneling. I wrote about it in my other article. It was for accessing Postgres, but same logic applies. It doesn't hurt to repeat it here.
Always open a tunnel first:
ssh -N -L 3307:localhost:3306 root@<server ip> &This will take your local 3307 port, and port forward a service that's listening on localhost and port 3306. To access it locally, just use MySQL workbench and enter localhost 3307, your remote mysql root user and password. Or continue using your terminal.
In intellij database view, there's no need to separately open an ssh tunnel, it's already there as an option.
Newsletter, smtp and Mailgun
There are 2 different mail settings you need to set for Ghost. One is for transactional mailing (password resets, logins, system messages...) and other is for bulk mailing (newsletter).
Transactional mailing can be any SMTP service. I'd advise against using your private gmail account. Just for precaution.
I'm using Mailgun for SMTP, and here's a good guide to get you started with setting up Mailgun.
Edit config.production.json and add
"mail": {
    "from": "<[email protected]>",
    "transport": "SMTP",
    "options": {
      "host": "<smtp.eu.mailgun.org|smtp.mailgun.org>",
      "service": "Mailgun",
      "port": 587,
      "secure": false,
      "requireTLS": true,
      "auth": {
        "user": "<[email protected]>",
        "pass": "<yoursmtppassword>"
      }
    }
  },
That's used for transactional email. Apply it by running sudo systemctl restart ghost. You can test it by signing up to your blog, you should get a magic link email.
Next configuration is for the newsletter. Go to yourghostdomain.com/ghost/#/settings/mailgun and add your region, mailgun domain and Mailgun private api key. You can find the mailgun private api key by going to Mailgun API security. Your key is the one in the HTTP webhook signing key section. I tried the same options as this guy but sending only worked with http webhook signing key.
You can test if it works from the terminal:
curl -s --user 'api:<key-yourkey>' \
    https://api.eu.mailgun.net/v3/<mailgun domain>/messages \
    -F from='<from>' \
    -F to='<recipient>' \
    -F subject='Hello from Mailgun' \
    -F text='This is a test email sent through Mailgun API'
If it worked, you should get something like {"id":"id","message":"Queued. Thank you."}.
Install Nginx
Nginx acts as a reverse proxy for Ghost, meaning that nginx sits between the client (user) and the Ghost application, managing the traffic and providing several benefits such as load balancing, caching, SSL termination, and more.
sudo su
yum install nginx
sudo systemctl start nginx
sudo systemctl enable nginx
And most basic https only configuration would be:
server {
    listen 443 ssl;
    server_name yoursite.com;

    ssl_certificate /etc/nginx/ssl/yoursite.com.crt;
    ssl_certificate_key /etc/nginx/ssl/yoursite.com.key;

    location / {
        proxy_pass http://localhost:2368;
        proxy_set_header Host $host;
        proxy_set_header X-Real-IP $remote_addr;
        proxy_set_header X-Forwarded-For $proxy_add_x_forwarded_for;
        proxy_set_header X-Forwarded-Proto $scheme;
    }
}

# Optional HTTP to HTTPS redirection
server {
    listen 80;
    server_name yoursite.com;

    return 301 https://$host$request_uri;
}
The advanced configuration could include optimizations:
# tweak buffers
client_body_buffer_size 10K;
client_header_buffer_size 1k;
client_max_body_size 8m;
large_client_header_buffers 2 1k;

# limit timeout for unresponsive clients, from digital ocean recommendation
# www.digitalocean.com/community/tutorials/how-to-optimize-nginx-configuration
client_body_timeout 12;
client_header_timeout 12;
send_timeout 10;

# SSL Configuration
ssl_protocols TLSv1.2 TLSv1.3;
ssl_prefer_server_ciphers on;
ssl_ciphers 'ECDHE-ECDSA-AES256-GCM-SHA384:ECDHE-RSA-AES256-GCM-SHA384:ECDHE-ECDSA-AES128-GCM-SHA256:ECDHE-RSA-AES128-GCM-SHA256';
# If Cloudflare free account, it has no intermediate certificate
# ssl_stapling on;
# ssl_stapling_verify on;
resolver 8.8.8.8 8.8.4.4 valid=300s;
resolver_timeout 5s;
# reduce handshake overhead, enables ssl session cache
ssl_session_cache shared:SSL:10m;
ssl_session_timeout 10m;
# Ensure the maximum performance for HTTP/2 connections
ssl_buffer_size 4k;

# Gzip Compression
gzip on;
gzip_types text/plain text/css application/json application/javascript text/xml application/xml application/xml+rss text/javascript;
gzip_vary on;
gzip_min_length 256;
gzip_comp_level 3;
gzip_proxied any;

# HTTP security headers

# Enforces HTTPS for all connections for one year
add_header Strict-Transport-Security "max-age=31536000; includeSubDomains; preload" always;

# Prevents browsers from MIME-type sniffing
add_header X-Content-Type-Options nosniff;

# Prevents the site from being embedded in an iframe, clickjacking protection
add_header X-Frame-Options SAMEORIGIN;

# Defense against cross-site scripting (XSS) attacks
add_header X-XSS-Protection "1; mode=block";

# Controls how much referrer information is sent with requests to other sites.
# "no-referrer-when-downgrade" sends the referrer only when the destination is using HTTPS.
add_header Referrer-Policy no-referrer-when-downgrade;
http block of nginx.conf
And then in your site.conf (conf.d directory):
upstream blog {
    server 127.0.0.1:2368;
}

server {
    listen 443 ssl http2;
    server_name .mydomain.com;

    ssl_certificate  /etc/nginx/ssl/cert.crt;
    ssl_certificate_key /etc/nginx/ssl/cert.key;


    # Buffer it to reduce server IO
    access_log /var/log/nginx/your-domain.access.log main buffer=32k;
    error_log /var/log/nginx/your-domain.error.log;

    location / {
        proxy_set_header X-Real-IP $remote_addr;
        proxy_pass http://blog;
        proxy_http_version 1.1;
        proxy_set_header Upgrade $http_upgrade;
        proxy_set_header Connection "Upgrade";
        proxy_set_header Host $host;
        proxy_buffering    off;  # Disable buffering to avoid delays in real-time
        proxy_set_header   X-Forwarded-For $proxy_add_x_forwarded_for;
        proxy_set_header   X-Forwarded-Proto $scheme;

    }
}


server {
    listen 80;
    listen [::]:80;
    server_name .mydomain.com;

    return 301 https://$host$request_uri;
}
Check that it compiles with nginx -t and do sudo systemctl restart nginx.
Now what did I do here?
In short, I enabled response compression, reduced https overhead with caching, enabled log buffering and improved security.
There's no need to add cache for static resources because of ETag header. Ghost uses ETag headers for dynamic content, which allows the browser to validate if the content has changed without downloading the entire resource again.
You can see the SSL stapling commented. This feature, if uncommented, improves SSL/TLS performance and security by providing the client with the status of the certificate from the Certificate Authority without the client having to make a separate request.
However, on the Cloudflare free plan you can create an origin certificate that provides you with the private and public key. There's no intermediary for the bundle. I might be wrong, but I think it's a paid feature.
Other important optimization is to set client timeouts for slow clients. If I wanted to "attack" your site, I'd make a bunch of slow HTTP connections to consume your server resources. As a result, your site would hang for all users. This wasn't set by default on nginx, I'm not sure if Apache sets it by default. Keep an eye on this one.
Migrating my data from Wordpress to Ghost
Official documentation says to install ghost plugin which will handle converting WordPress data into ghost universal import format.
However, ghost WordPress plugin did not work in my case. Neither zip, neither json import.
Ghost also has a tool https://github.com/TryGhost/migrate/ for migrating via REST api or wordpress xml.
I'd use REST api but I had wordfence with 2fa enabled, I didn't know how to skip the 2fa:
migrate wp-api --url https://www.wordpressblog.com --auth user:passI used the wp-xml method:
- Download wordpress xml (Go to Wordpress/Tools/Export all content)
- Call
migrate wp-xml migrate wp-api --pathToFile wp.xml - Go to Ghost universal import and upload the file that wp-xml created.
Steps after migration
- Delete placeholder posts and pages
- Double check if your post dates are exported correctly, all images are correctly downloaded and none of the alts are missing. For a featured image, alt might be missing.
- There's no categories in Ghost. Categories are converted to tags.
- There's no noindex and removing the page from sitemap. Either code inject noindex meta per post or create a robots.txt that disallows crawling of certain pages and their children (e.g. tags, author pages).
- If you want to create a robots.txt, it has to be in the root of your theme.
How to reset admin password from server
This feature will come handy if you forgot your password and your mailing service is not working. You'd then want to reset the password from the server.
First, get a new password
You need a password hash that you'll update in the database. For a hash use something like bcrypt-generator.com, input your new password and encrypt.
If you're still using SQLite
Go to your server and find your ghost SQLite instance. It's probably:
sqlite3 ./content/data/ghost-local.dbIf you don't have sqlite3 and are on amazon linux os, then do yum install sqlite-devel.x86_64.
update users set password="<yourhash>" where email="your@email";If you're using MySQL
mysql -u root -p # enter password when asked
use yourghostdb # your database name, it's written in config.production.json
update users set password="<yourhash>" where email="your@email"; # hash of your password. use bcrypt generator
You should be able to login with your new password.
Final tips
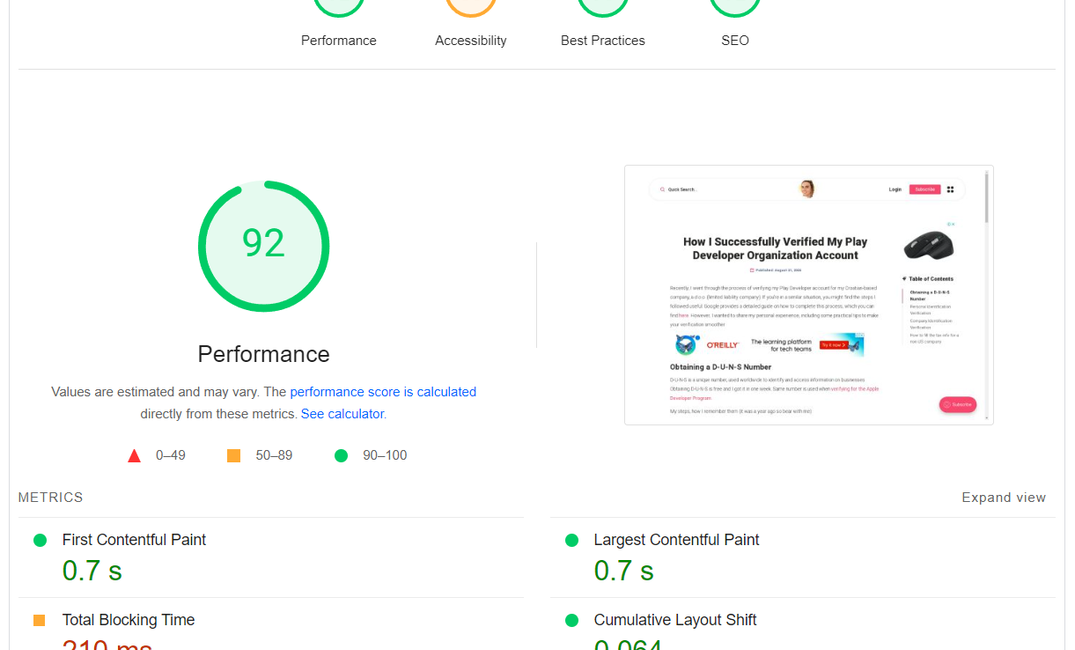
I think I've covered most of it. Make sure that you restart Ghost after every config change, that you've set the correct URL in ghost config, nginx matches the server name, and your DNS server is pointing at your server ip (A record). Featured image of this blog post is a result of pagespeed for one of my blog posts. Given that I load a YouTube iframe in there, google ad manager and google analytics, I'd say a 92 score is pretty decent. Mobile score could be better, but most of my visitors are desktop users.