
Getting Google login to work in Expo native and web isn't hard to code. It's the setup that trips you up. If you don't know what to watch out for...
Enable Google Sign in method
Go to https://console.firebase.google.com and select authentication. If you don't see an authentication option, then go to "All products" and select it there.
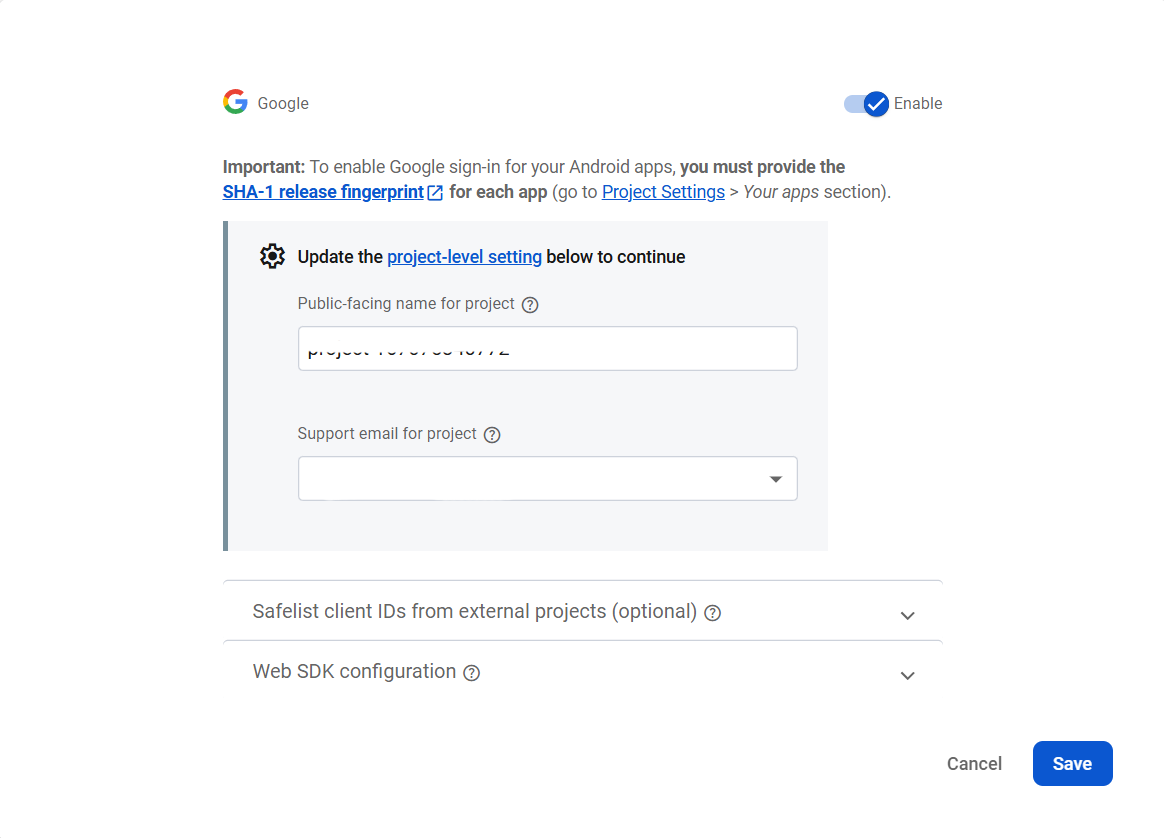
If you don't see the Sign-in method right away, click on "Get started". Select Google. Select support email in the dropdown and click "Next" to create.
Ignore the Sha field for now.
Download Google service files
If you have firebase integrated already, you will need to redownload google service files. If you don't have a clue where to start, go through my firebase for web and native integration.
Configure Google Web Client settings
This is an advanced setting, so you can skip it if only trying out Google Login. But if you intend to publish your app, you will need to adjust some oauth settings, like:
- Authorized Javascript origins - where requests start from
- Authorized Redirect URIs - where user goes after logging in
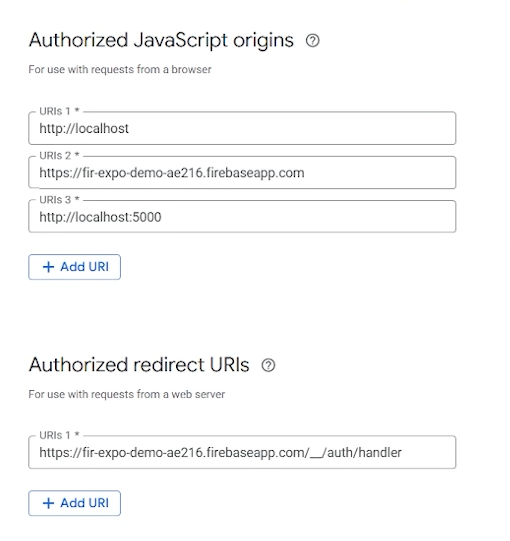
Google already populates those fields on Google sign in method creation. You can find those settings by going to https://console.cloud.google.com, select your project (same name as firebase project), search for credentials and find the "Web client (auto created by Google Service)". It goes without saying, localhost should be disabled for production.
Configure Sha fingerprints for Android
Google needs to verify the identity of the android app making the request, and that's what sha fingerprints are for.
To add fingerprints, open firebase project settings and click on the Android app settings under your app. You will see the field "Sha certificate fingerprints" and you will need to add a couple of fingerprints.
You get a different SHA1 fingerprint when testing with expo development client, or another eas profile, or if your app is published to the store, or when installing from "internal app sharing", and lastly when running the native android build.
Running a native android build
When running a native android build (expo run:android), android directory is created in your project root and debug.keystore. You will need keytool to get the fingerprint. Run:
keytool -list -v -keystore android/app/debug.keystore
# Enter keystore password: android
If keytool is not found, add your JAVA_HOME bin directory to the path:
export JAVA_HOME=C:\Program Files\Java\jdk-<version>
export PATH=$PATH:$JAVA_HOME/bin
for Windows. Linux is similar, but JAVA_HOME will be in a different place.
Getting fingerprint for Play Store
When you upload your app to the Play Store, Google Play signs it with their own key (unless you opted out). If you opted out, skip this.
Find the fingerprint by going to Play Developer Console, select your App, Test and release in the sidebar, Setup and click on App signing.
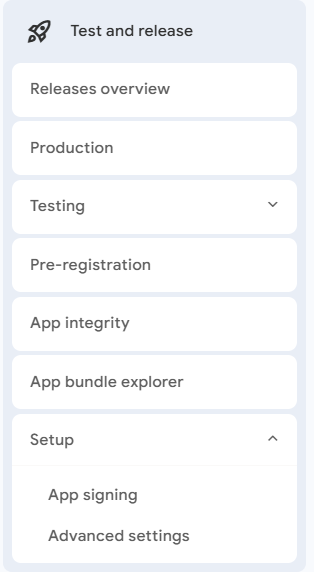
Copy the Sha-1 under "App signing key certificate" into firebase project settings for android.
If you don't see this page and Google asks you to create a release, you'll need to publish at least one release. I believe, publishing in test track should be enough.
Running Expo Development Build
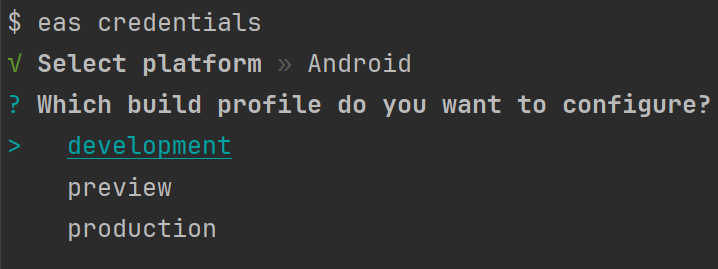
If you created eas.json, you will need to run this for each profile you created.
Run eas credentials, choose Android platform, your profile and you should see the sha fingerprint.
Running Expo Go
Expo Go doesn't support native modules. Use Firebase web login instead. I've rarely seen developers using Expo Go. Native modules often end up being used in an expo app. It's possible to make it work, but it's cumbersome.
Using Internal App Sharing
When you upload your apk to internal app sharing, Google will sign it with their own key. I rarely use this feature, but it's useful if you just want to share your apk with your colleagues, and don't want to publish it in one of the test tracks.
Find internal app sharing by selecting your app in play console, Test and release in sidebar, Testing and then internal app sharing.
If you don't see the fingerprint page, solution is probably the same as with not seeing the App signing certificate page - publish at least 1 release on test track.
Handling User Session
Firebase has a hook called onAuthStateChanged, and the call is the same on native and web. It allows the app to keep track of user session and keeps the UI in sync. If you were to logout in another tab, then that logout would be propagated to all tabs where the hook is listening.
useEffect(() => {
  return firebase.auth().onAuthStateChanged((user) => {
    setUser(user)
  });
}, []);
Tips for Web
Besides creating the web configuration in project settings, you'll need to adjust in the Google Cloud Console for production - remove localhost for production use.
In the module where you initialized firebase, add the auth instance:
const fbAuth = getAuth(app);In the google login handler, add the call that will open the popup.
signInWithPopup(fbAuth, new GoogleLoginProvider())As soon as the user logs in, onAuthStateChanged should trigger, returning the user info.
Tips for Native
Install dependencies:
npx expo install @react-native-google-signin/google-signin @react-native-firebase/authI use google-signin package for the google signin functionality, and I need react native firebase to link the signin info to firebase session:
const handleLogin = async () => {
    await GoogleSignin.hasPlayServices();
    const response = await GoogleSignin.signIn();
    if (response && response.data) {
      const googleCredential = GoogleAuthProvider.credential(response.data.idToken);
      await firebase.auth().signInWithCredential(googleCredential);
    } else {
      console.warn('No response from GoogleSignin');
    }
};
Login doesn't work on devices without Play Store. When the popup opens, user signs in, then it will return a response that contains idToken. It can be used to link to the firebase auth session (see the programmatic call to signInWithCredential).
You will also need to provide the webClientId, although it's on native. Documentation says that it's needed for offline access. You will add this code somewhere at the top of your google login module.
GoogleSignin.configure({
  webClientId: process.env.EXPO_PUBLIC_WEB_CLIENT_ID,
  offlineAccess: true,
});
Web client id can be found in firebase google sign in settings.
I didn't want to paste too much code, just the highlights. Check the GitHub repo or YouTube if you want full code examples.
More Reads
- Firebase integration in native and web
- GitHub repository with example
- Youtube: https://youtu.be/RhnmFVDy2mQ