

I love automating as much of my development workflow as possible. If you’ve been following my work, you’ve probably noticed that from the types of articles I write—mostly on DevOps and continuous integration.
Recently, I discovered n8n, an open-source workflow automation tool. At first glance, it looked so cool that I had to find a way to use it. One thing I really like about n8n is that it’s open source, which means I can self-host it on my CentOS Stream 10 distro.
My first use case? Automating my blog’s newsletter workflow. I use Ghost CMS, which has a built-in newsletter subscription system. While that works fine for my usual posting frequency (about once every two weeks), it’s not flexible when inspiration strikes.
What if I suddenly publish seven posts in a week? I wouldn’t want to flood my subscribers with emails for each post. Instead, I’d prefer to send a weekly or bi-weekly digest—a simple compilation that lets them choose what they want to read.
Here’s my solution: hook n8n into Ghost’s custom integration to update MailerLite whenever a new member joins my blog.
Making It Work:
- Install and configure n8n
- Serve it behind a VPN
- Expose public routes via NGINX
- Add a new workflow for MailerLite
- Connect that workflow to Ghost’s custom integrations
In this post, I’ll walk you through how I set it all up. It might be easier if you follow along in my youtube video. Whatever works for you.
How to self host N8n
I'm using Hetzner for hosting, and I highly recommend them. You can get decent computing power for the money. My current setup runs on an 8GB vCPU with CentOS Stream 10, costing around 17 euros per month. I wouldn’t suggest going below 8GB of RAM because Docker, n8n, and PostgreSQL will consume a significant amount of memory, especially if you're handling complex workflows.

Running n8n from docker
I run n8n in Docker with a simple docker-compose.yml setup that launches both n8n and PostgreSQL as its database. If you’ve got Docker installed on your system, this setup should work out of the box:
services:
  db:
    image: postgres:16-alpine
    container_name: db
    restart: unless-stopped
    expose:
      - 5432
    environment:
      - POSTGRES_USER=<FILL_POSTGRESS_ROOT_USER>
      - POSTGRES_PASSWORD=<FILL_POSTGRESS_ROOT_PASSWORD>
      - POSTGRES_DB=<FILL_N8N_DB>
      - POSTGRES_NON_ROOT_USER=<FILL_POSTGRESS_USER>
      - POSTGRES_NON_ROOT_PASSWORD=<FILL_POSTGRESS_PASSWORD>
    volumes:
      - <FILL_N8N_PATH>/database:/var/lib/postgresql/data
      - <FILL_N8N_PATH>/init-database.sh:/docker-entrypoint-initdb.d/init-data.sh:ro
    healthcheck:
      test: ['CMD-SHELL', 'pg_isready -h localhost -U <FILL_POSTGRESS_USER> -d n8n']
      interval: 5s
      timeout: 5s
      retries: 10

  n8n:
    image: n8nio/n8n
    container_name: n8n
    hostname: n8n
    restart: unless-stopped
    environment:
      - DB_TYPE=postgresdb
      - DB_POSTGRESDB_HOST=<FILL_N8N_DB>
      - DB_POSTGRESDB_DATABASE=<FILL_N8N_DB>
      - DB_POSTGRESDB_USER=<FILL_POSTGRESS_USER>
      - DB_POSTGRESDB_PASSWORD=<FILL_POSTGRESS_PASSWORD>
      - NODE_ENV=production
      - WEBHOOK_URL=<PUBLIC_WEBHOOK_URL>
      - NODE_FUNCTION_ALLOW_BUILTIN=*
    ports:
      - "127.0.0.1:5678:5678"
    expose:
      - 5678
    links:
      - db
    volumes:
      - <FILL_N8N_PATH>/storage:/home/node/.n8n
      - <FILL_N8N_PATH>/files:/files
    depends_on:
      db:
        condition: service_healthy
Notes about docker-compose.yml:
Anywhere you see <PLACEHOLDER>, like <POSTGRES_USER> or <N8N_DB_NAME>, replace it with your own data.
Once running, n8n will be accessible at localhost:5678.
If you need n8n to receive external API calls, replace <PUBLIC_WEBHOOK_URL> with your public domain or IP address.
If it’s only for internal use (e.g., behind a VPN), you can leave it blank or set it to your internal VPN URL.
Fixing Permission Issues
The n8n Docker container runs as the node user, which corresponds to UID 1000. To avoid permission issues, ensure that the directories you’re mounting (like storage and files) are owned by UID 1000:
sudo chown -R 1000:1000 /path/to/your/n8n/data
Running n8n behind a VPN with Tailscale
I host my n8n behind VPN, and I do that because I'm careful. I got bitten once by hosting a "secure" public Jenkins. It wasn't secure, it's all I'll tell you. Put your Jenkinses behind VPN if you like to use them.
For n8n, the only thing I expose to the public is the webhook route—nothing else.
I use tailscale for my vpn solution because it is ridiculously easy to set it up.
Just follow their getting started guide and you're good to go. I connected my servers and local computers with tailscale up and it works like magic. If I need access to service from my cloud that's not open to the public, I can just use the unique name + unique domain that tailscale assigned or the tailscale ip (100.x.x.x) and use the service. I'd suggest that you also look into setting up tailscale permissions to fine tune what's accessible to what (acl rules).
You might raise an eyebrow when I mention using a unique name and domain - doesn’t that mean there’s a central control server outside of your control? What could possibly go wrong with that?
There’s an open-source alternative to Tailscale called headscale, which lets you host your own control server for full control over your VPN network. If you want to go even deeper, you can skip Tailscale entirely and work directly with WireGuard, the underlying protocol that Tailscale is built on.
As for me? I’m a bit too lazy to set all that up right now—but maybe that’ll change if I run into another security scare.
By default, n8n runs on localhost:5678. To expose it to your Tailscale VPN network, you can use the tailscale serve command. Here’s how I manage it:
tailscale serve --bg 5678
To check what's being served, just run tailscale serve status.
If you need to reset or clear your serving configurations, just tailscale serve reset
What About Tailscale Funnel?
Tailscale offers a feature called Funnel, which allows you to expose services publicly, beyond your VPN. However, in my experience, I couldn’t get Funnel to expose only specific endpoints while keeping everything else restricted to the VPN. It seemed like once Funnel was enabled, the service became fully public -which defeats the purpose of my secure setup.
My Solution for partial public access is Nginx reverse proxy
Since Funnel didn’t fit my needs, I opted to set up an NGINX reverse proxy to expose only the routes that needed to be public, while keeping everything else behind the VPN:
server {
    listen 443 ssl http2;
    server_name something.yourdomain.com;

    # don't forget to assign your https certificates...
    ssl_certificate  /etc/nginx/ssl/cert.crt;
    ssl_certificate_key /etc/nginx/ssl/cert.key;

    location ^~ /webhook/ {
        proxy_pass http://localhost:5678;
        proxy_http_version 1.1;
        proxy_set_header Upgrade $http_upgrade;
        proxy_set_header Connection 'upgrade';
        proxy_set_header Host $host;
    }

    location ^~ /webhook-test/ {
        proxy_pass http://localhost:5678;
        proxy_http_version 1.1;
        proxy_set_header Upgrade $http_upgrade;
        proxy_set_header Connection 'upgrade';
        proxy_set_header Host $host;
    }

    location / {
        return 403;
    }
}
In this configuration, only /webhook/ and /webhook-test/ are accessible from the public internet. Any other request will return a 403 Forbidden response. Since nginx is listening on 443, you need ssl certificates.
Integrating N8n with Ghost
So far, I’ve covered how to set up n8n. Now, let’s move on to the fun part:
Using n8n to synchronize my Ghost CMS subscribers with MailerLite.
I’ll keep things concise here, just highlighting the key steps. If you want to see the full process in action, check out my YouTube video where I walk through it step-by-step.
MailerLite Part
MailerLite is free and easy to setup. Go to Subscribers, groups, add a new group. That's how I separate subscribers from different sites that I have.
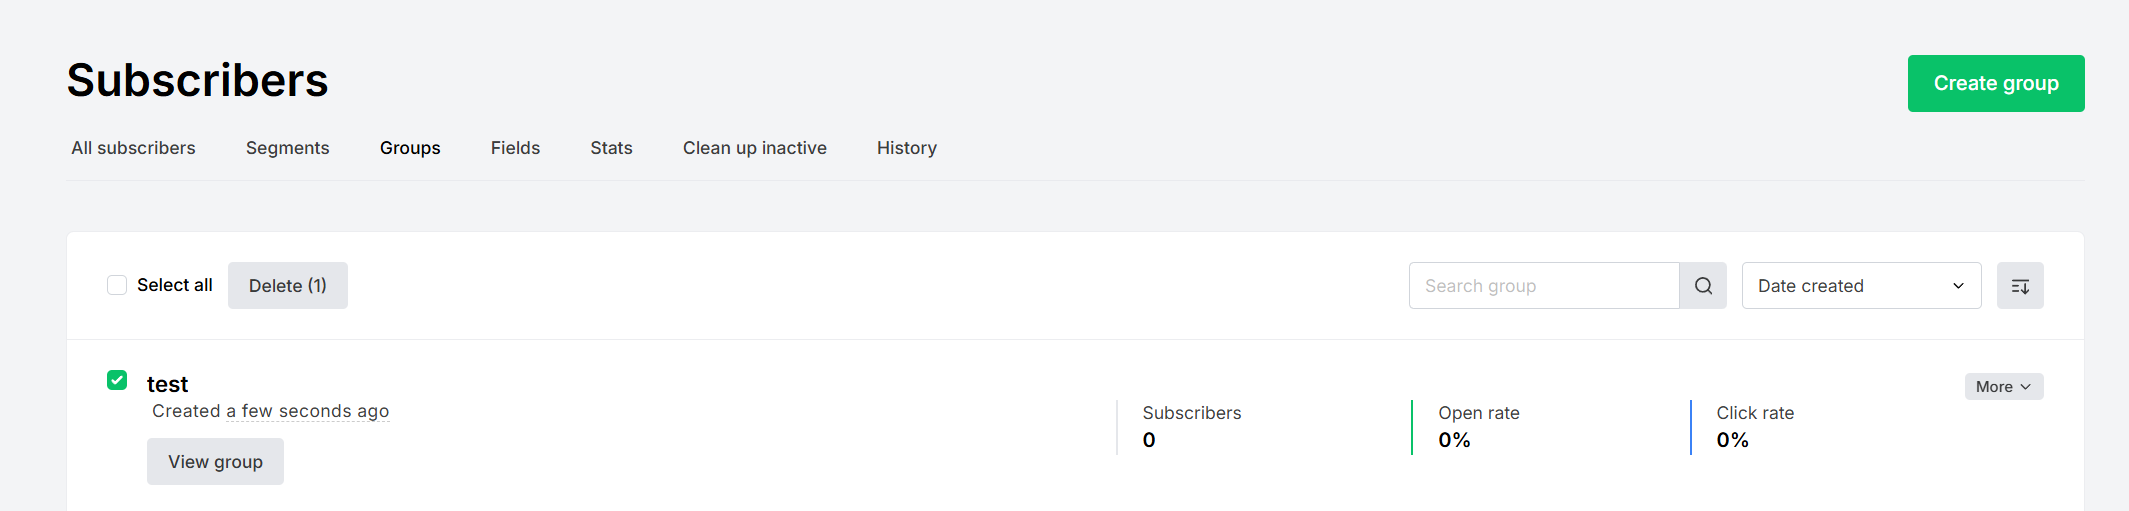
You need the group id, and one easy way to obtain it: open the group and grab the group_id from query parameter:

You also need the API token, go to https://dashboard.mailerlite.com/integrations/api and create one. You can limit the usage to the ip address of your n8n server.
N8n Part
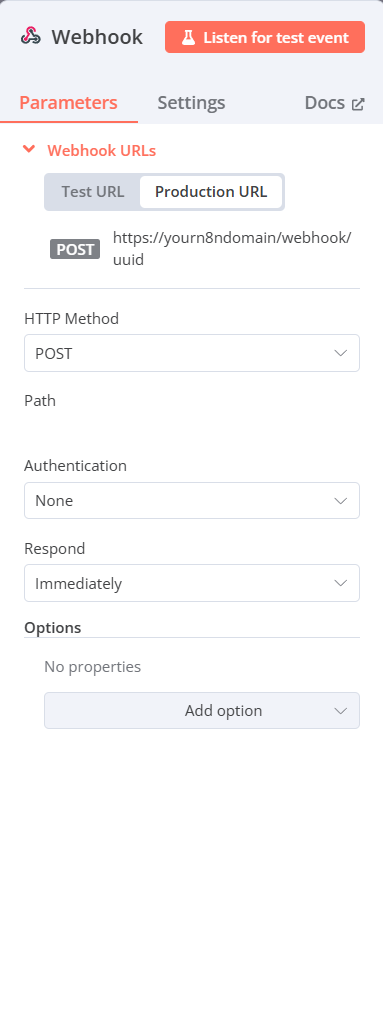
To create an integration with Ghost that are 2 necessary nodes + 3rd the integration node. First part is the webhook part. It listens on provided url, and once you get the first request, you can reuse it to test other steps. There is test url and production url, test url can be used for testing even if the workflow is not enabled. Production url is the one you need to copy and save it for ghost custom integration. Don't forget to enable the workflow once finished.
First node is the webhook, it listens to POST http requests.
Second node that should come immediately after webhook is the authorization node. It should verify the secret coming from ghost. This is how you secure the workflow to listen only for requests from your ghost instance.
const crypto = require('crypto');
const receivedSignature = $json.headers['x-ghost-signature'];
if (!receivedSignature) {
  throw new Error('Invalid request!');
}
const receivedBody = $json.body;
const sha256Match = receivedSignature.match(/sha256=([^,]+)/);
const timestampMatch = receivedSignature.match(/t=(\d+)/);
const sha256 = sha256Match ? sha256Match[1] : null;
const timestamp = timestampMatch ? timestampMatch[1] : null;
const currentTimestamp = new Date().getTime();
const timeLimit = 900000;
if (Math.abs(currentTimestamp - timestamp) > timeLimit) {
  throw new Error('Signature expired.');
}
const ghostSecret = 'test';
const hmac = crypto.createHmac('sha256', ghostSecret);
hmac.update(JSON.stringify(receivedBody) + timestamp);
const generatedSignature = hmac.digest('hex');
if (generatedSignature !== sha256) {
  throw new Error('Invalid signature! Request might not be from Ghost.');
}
return $json;
This code doesn't allow requests that don't have x-ghost-signature header, are sent in the last 15 minutes, and secret should match to what's received in the request.
Third node is the integration part. For example, my code for creating a mailerlite subscriber is:
await this.helpers.httpRequest({
  url: `https://api.mailerlite.com/api/v2/groups/<GROUP_ID>/subscribers`,
  method: 'POST',
  body: {
    email: $json.body["member"]["current"]["email"],
    name: $json.body["member"]["current"]["name"] || '',
  },
  headers: {
  'Content-Type': 'application/json',
  'X-MailerLite-ApiKey': `<API_KEY>`,
  },
  json: true
});

return $json;
And that's it for the n8n part. You can send one request and test the steps from the payload of that request.
Ghost custom integration part
Go to Ghost admin, search for integrations and add a new custom integration.

Hook is for Member added, and in the url it will be the hook of your created n8n hook. As the secret input some secure key. It will be used to authorize that the request is coming from ghost, not from anywhere. In my example, I used test as a secret. I'm sure you'll use something more complicated.
When you've saved the changes, for a test go to members and add a new member. It should trigger a new execution on n8n.
Test it
Create a member and check out your n8n executions. If it's green, you're good to go. If it's red, double click on it, look at the payload you got, look at the error why it failed. You can always debug your steps from the failed payload. You can add console.logs if it helps more.
That's about it from my beginner level knowledge of n8n. I can think of another use case. Maybe enabling algolia search instead of ghost native, because I don't like that post content is included in the search results.
Recommended Links
- Get free 20$ in cloud credits with hetzner https://hetzner.cloud/?ref=CPXpIy0FngiI
- Signup to MailerLite https://www.mailerlite.com/a/Dn5PooRDcAvW
- How to self host Ghost blog
- Video walkthrough in YT